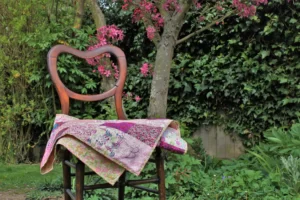
Welcome to part 3 of my quilting beginner’s guide, where together we are creating a simple quilt. In part 1 we organised fabric and in part 2 we pieced together the quilt top.
Now we’re going to add our embroidery initial, put together the quilt sandwich, hand-quilt and bind the quilt.
Once that’s done, you’re finished and complete my quilting beginner’s guide!
Embroidery
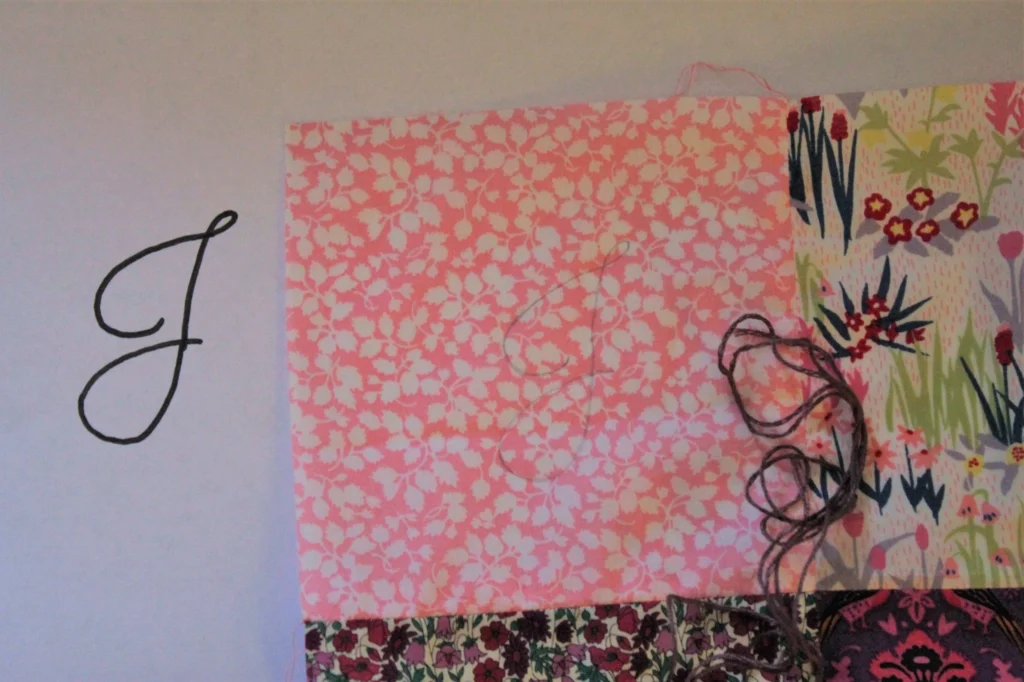
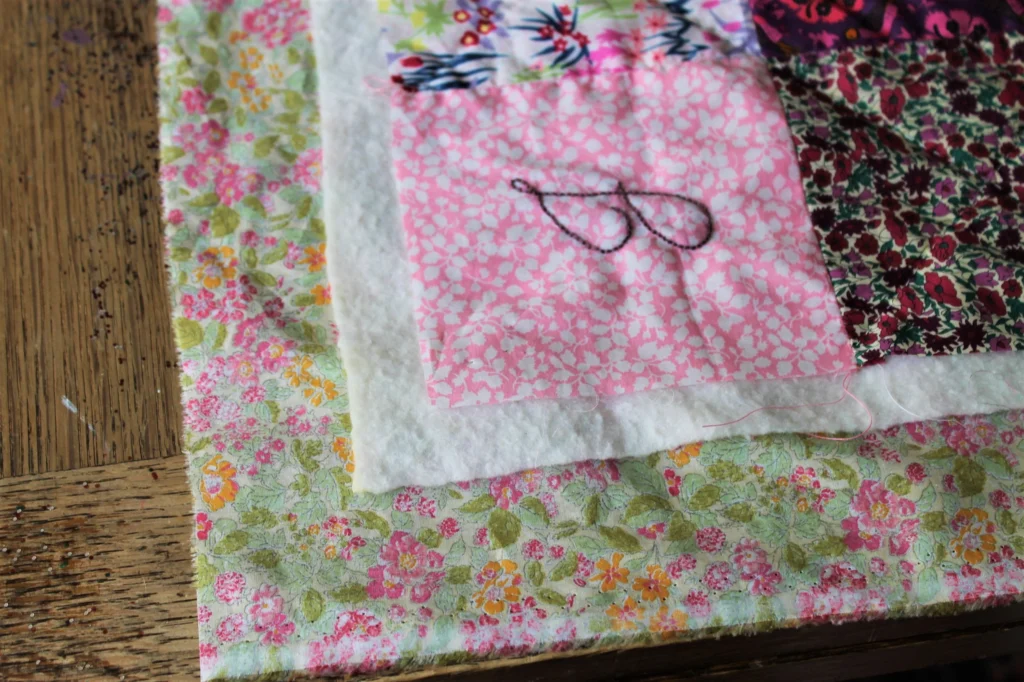
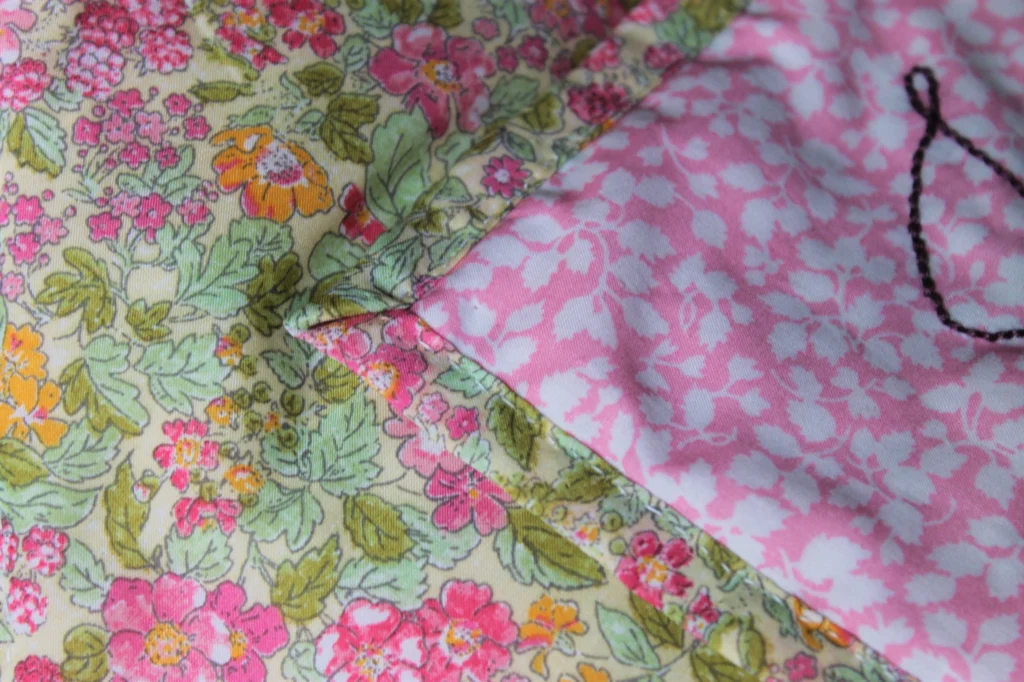
I’ve drawn out a swirly J, for Jean, that I’m going to embroider onto the top left square of the quilt. Using a sharpie, I’ve drawn it out onto a piece of paper.
Place it behind the fabric square and with a pencil (or fabric pen if you happen to have one) make small dots like a dot-to-dot drawing or lightly sketch out the letter.
Remember that there’s a ¼ inch seam around the entire square. Currently only 2 sides have been seamed, while the outer edges are still raw. If it helps, draw on a ¼ inch seam on the 2 raw edges so you can make sure your initial placement will be central once the quilt is finished.
I’m using a thick mauve embroidery thread made by DMC that will completely cover those dots once I’ve done.
I thread my needle and use a backstitch, following the line.

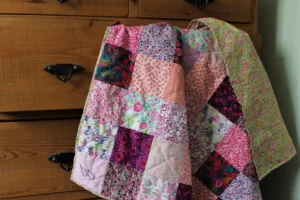
Creating A Quilt Sandwich – Quilting Beginner’s Guide
We call it a quilt sandwich because we are placing a thick layer of padding between 2 pieces of fabric, like holding sandwich filling between 2 pieces of bread.
Start by laying out your backing fabric on the floor with the right side facing down so the rough side is facing up at you. Once it’s smoothed down nicely, unroll your padding and place this on top. I leave about 2 inches at the edge so I can see the backing fabric. Smooth this down too so there are no bumps.
Next, place your finished and ironed quilt top with the right side facing up on top of the padding. Again, leave a gap between the edge of the quilt top and edge of the padding. Smooth it down again.
It should now look like this.
Now we need to pin the 3 layers together. I start from the centre, but you can start from one corner and work your way across if you like. You’ll find creases and bumps that you didn’t notice before, so just keep smoothing it down flat as you work your way around pinning the layers together.
Once you’re satisfied and everything is pinned smoothly (I pin at most corners where squares meet and it takes at least an hour to get right) you’re probably going to need a break!
Now we cut off the excess padding and backing fabric, leaving a few inches excess. Often as we hand quilt, the fabric layers are moved around a bit so we want to make sure there’s plenty of space for the layers to be smoothed further without running out of padding or backing.
At this point you can roll up the quilt sandwich and put it away for another day or get started with hand quilting.
Hand-Quilting the Quilt
I’m going for the handmade vibe, so I’m hand-quilting. Machine quilting is quicker but, in my opinion, it easily goes wrong and takes time to master – not ideal for your first quilt project!
You need quilting thread for hand quilting. It needs to be strong enough to stand the test of time as it’s exposed on both sides of the quilt. Standard cotton or polyester won’t last long, so picking a super strong quilting thread is essential. I’m using plain white quilting thread by Gutermann.
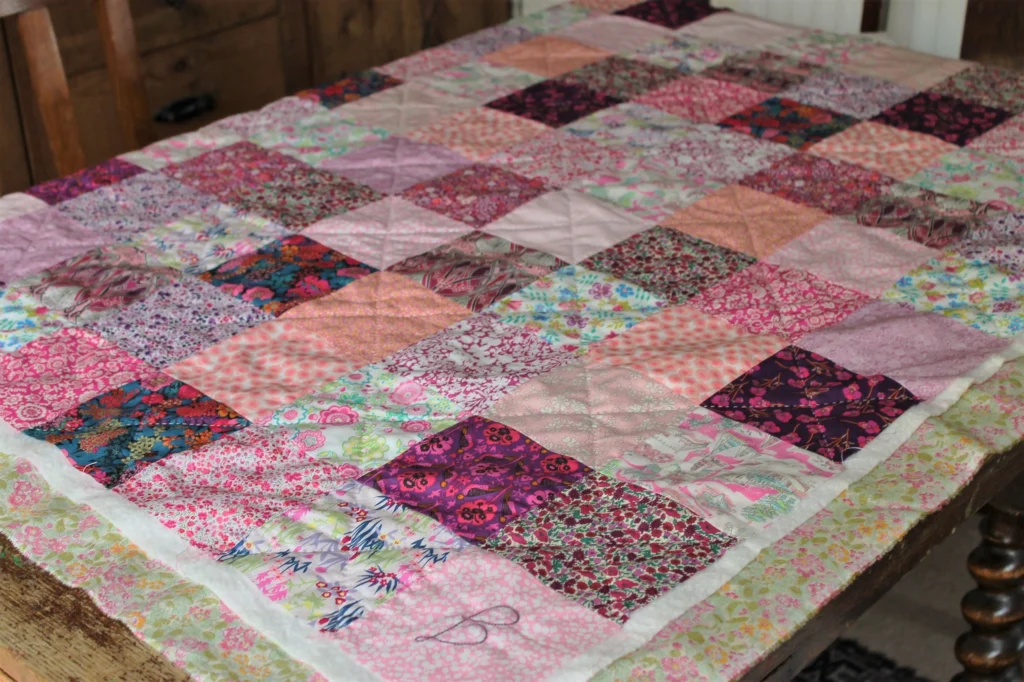
Lay out the quilt on a large, flat surface. I’m using the dining table.
I’m going to quilt diagonal lines over the square grid pattern, missing one line each time. This means I won’t be quilting over the embroidered square. Take a look at my picture to see what I mean. You could simply quilt every square on the diagonal or follow the rows and columns by sewing ¼ inch to the right of every seam.
I use masking tape to mark out where I need to sew. It just keeps all my lines very neat and the masking tape is gentle enough that I can easily tear it off the quilt top without pulling at seams or destroying the fabric edges.
Thread your needle and tie it to the top fabric so the knot is hidden between the quilt layers. Now we’re going to do a simple running stitch. Up and down through the fabric. My stitches are about 3mm or 4mm each, which is quite small. You can do larger stitches if you’re not very patient!
Finishing the Quilt – Quilting Beginner’s Guide
Remove the pins as you go, smoothing down the quilt layers so everything stays even with no baggy gaps – but don’t stitch so the fabric is pulled taught, or it will contort and rip when it’s used. It needs a little give so the finished quilt can be rolled up and used comfortably.
Once you’ve quilted lines one way, turn the quilt and stitch lines the other way, to create a trellis-like grid. You need to feel the thread with your fingers as you’re stitching to make sure there are no knots or snags as you go. Once you get into the habit of checking the back of the quilt every square or so you’ll be flying!
Once that’s all done, trim the padding layer ONLY so that it’s the same size as the top of the quilt. The backing needs to be a few inches wider than the rest of the quilt – which it should be if you followed my instructions when creating and pinning the sandwich.
Now you need to trim the edge of the backing so that it’s exactly 3/4 inches more than the quilt front and padding on all sides.
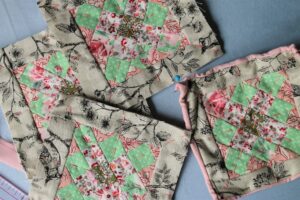
Binding the Quilt
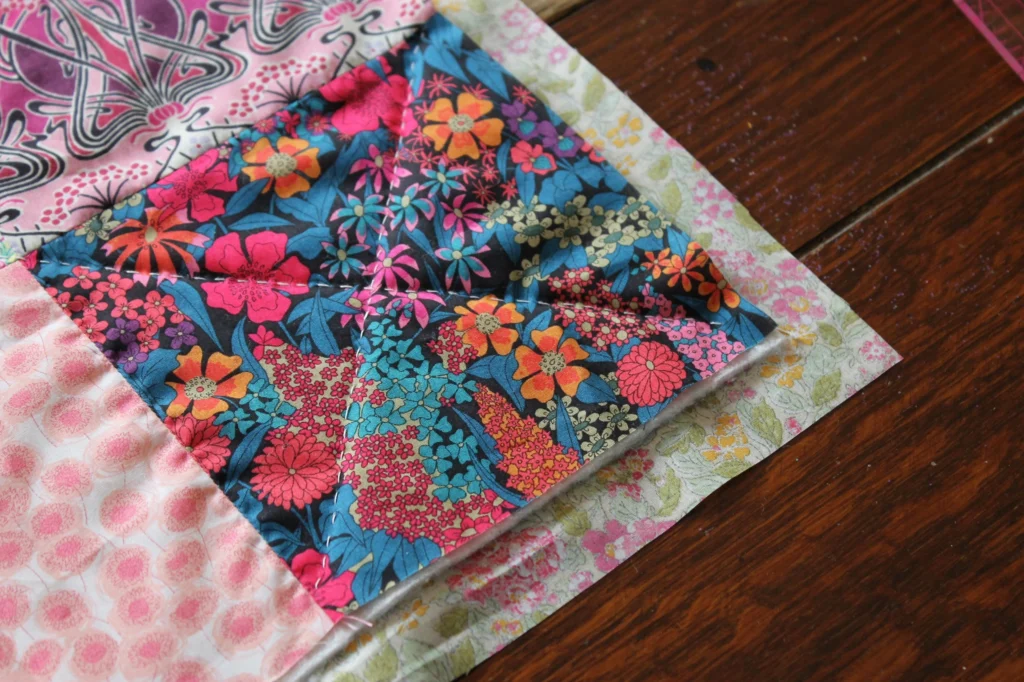
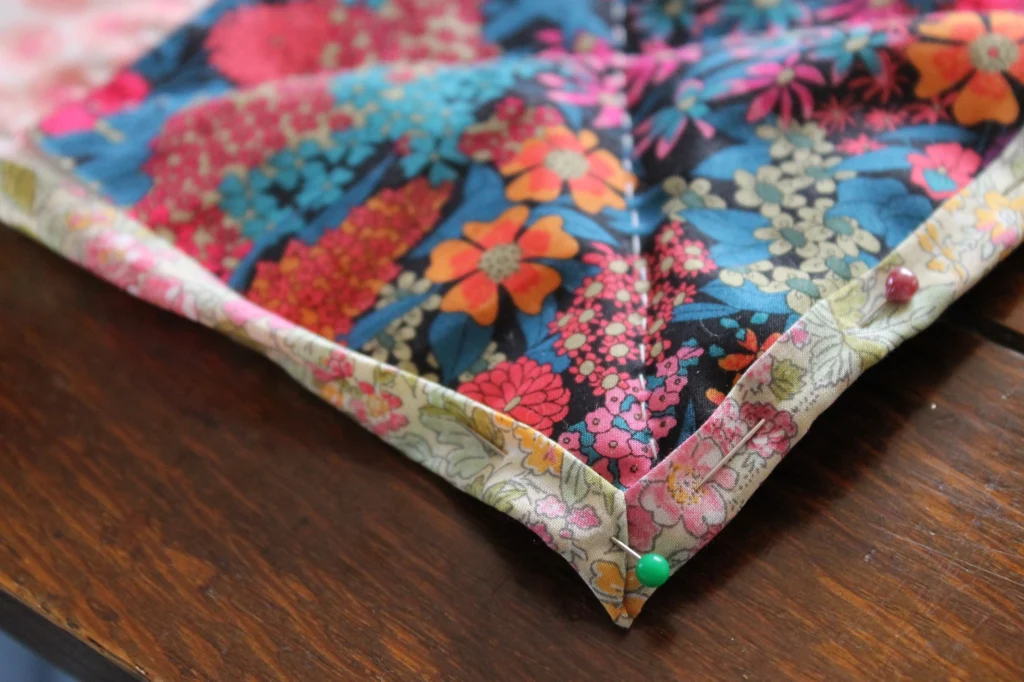
To cover those edges and lock in all our stitches, we’re going to fold over that extra backing fabric that’s hanging over the edge. Fold it over once to hide the raw edge, then over again so it’s overlapping ¼ inch of the front.
Do one side at a time, pinning it in place. When you get to the edge, we’re going to do a mitred corner so it looks neat and professional. It sounds intimidating but once you get the hang of it, you’ll find it super easy.
Follow my pictures, as it’s easier to demonstrate than explain.

Now you can either machine sew around the binding or do it by hand. As it’s a simple, handmade quilt, I’m going to do it by hand. I’m using the same running stitch I did for the quilting part, so my stitches are visible on the front and back. I’m sewing as close to the edge of the binding as I dare.
Stitch all the way around, hiding any knots between the binding and the quilt top if you run out of thread.
Once you’re finished and it’s tied off neatly, all you need to do is cut away any loose threads that are poking through.
Your quilt is finished!