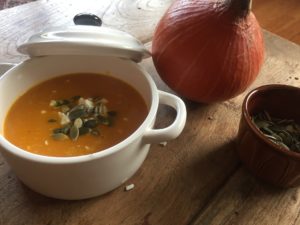
In this article we will be carving pumpkin. For pumpkin soup, check out this pumpkin recipe. You can find the easy pumpkin recipes below, but first we’ll start with the carving.
The tradition of pumpkin carving is thought to have started in 19th century Ireland where they carved jack o’lanterns and spooky faces into turnips and pumpkins to ward off evil spirits. These vegetables were used due to the high availability during harvest time – pumpkins caught on because the carving pumpkin variety is much easier to carve and gives off a better glow as well as being larger than their turnip counterparts.
To grow large carving pumpkins yourself, you’ll need to carefully prune and care for your pumpkin plant all year. We’ll be writing a great post on how to grow pumpkins soon, but the basics are: water, sunshine, space and pruning. To make a huge pumpkin you need to pick just 1 to grow per plant. Cut off the smaller pumpkins and guide the plant to focus on just growing that 1. Everyday you’ll need to prune the vine, ensuring all nutrients are being sent to that one pumpkin. Your efforts could be rewarded with a prize-winning pumpkin! Growing a large pumpkin variety is essential for pumpkin carving as well as careful care and nurturing. Check back here in May for our 2018 pumpkin planting blog!
The 3 best pumpkin carving varieties are:
Jack o’Lantern Pumpkins – the traditional carving pumpkin that is normally orange but can come in a variety of different colours from white to stripy green. Their flesh is thin and easy to carve.
Cinderella Pumpkins – known as Rouge Vif d’Estampes in France. These are large, traditional looking pumpkins that have deep gorges. They aren’t the easiest to carve but they look fantastic if you do!
Sugar Pumpkins – also known as pie pumpkins. These make squat, little jack o’lanterns that are cute to look at. The flesh is very tasty making them perfect for cooking with.
Anyway, enough pumpkin propaganda, let’s get stuck in to the pumpkin carving.
Pumpkin Carving
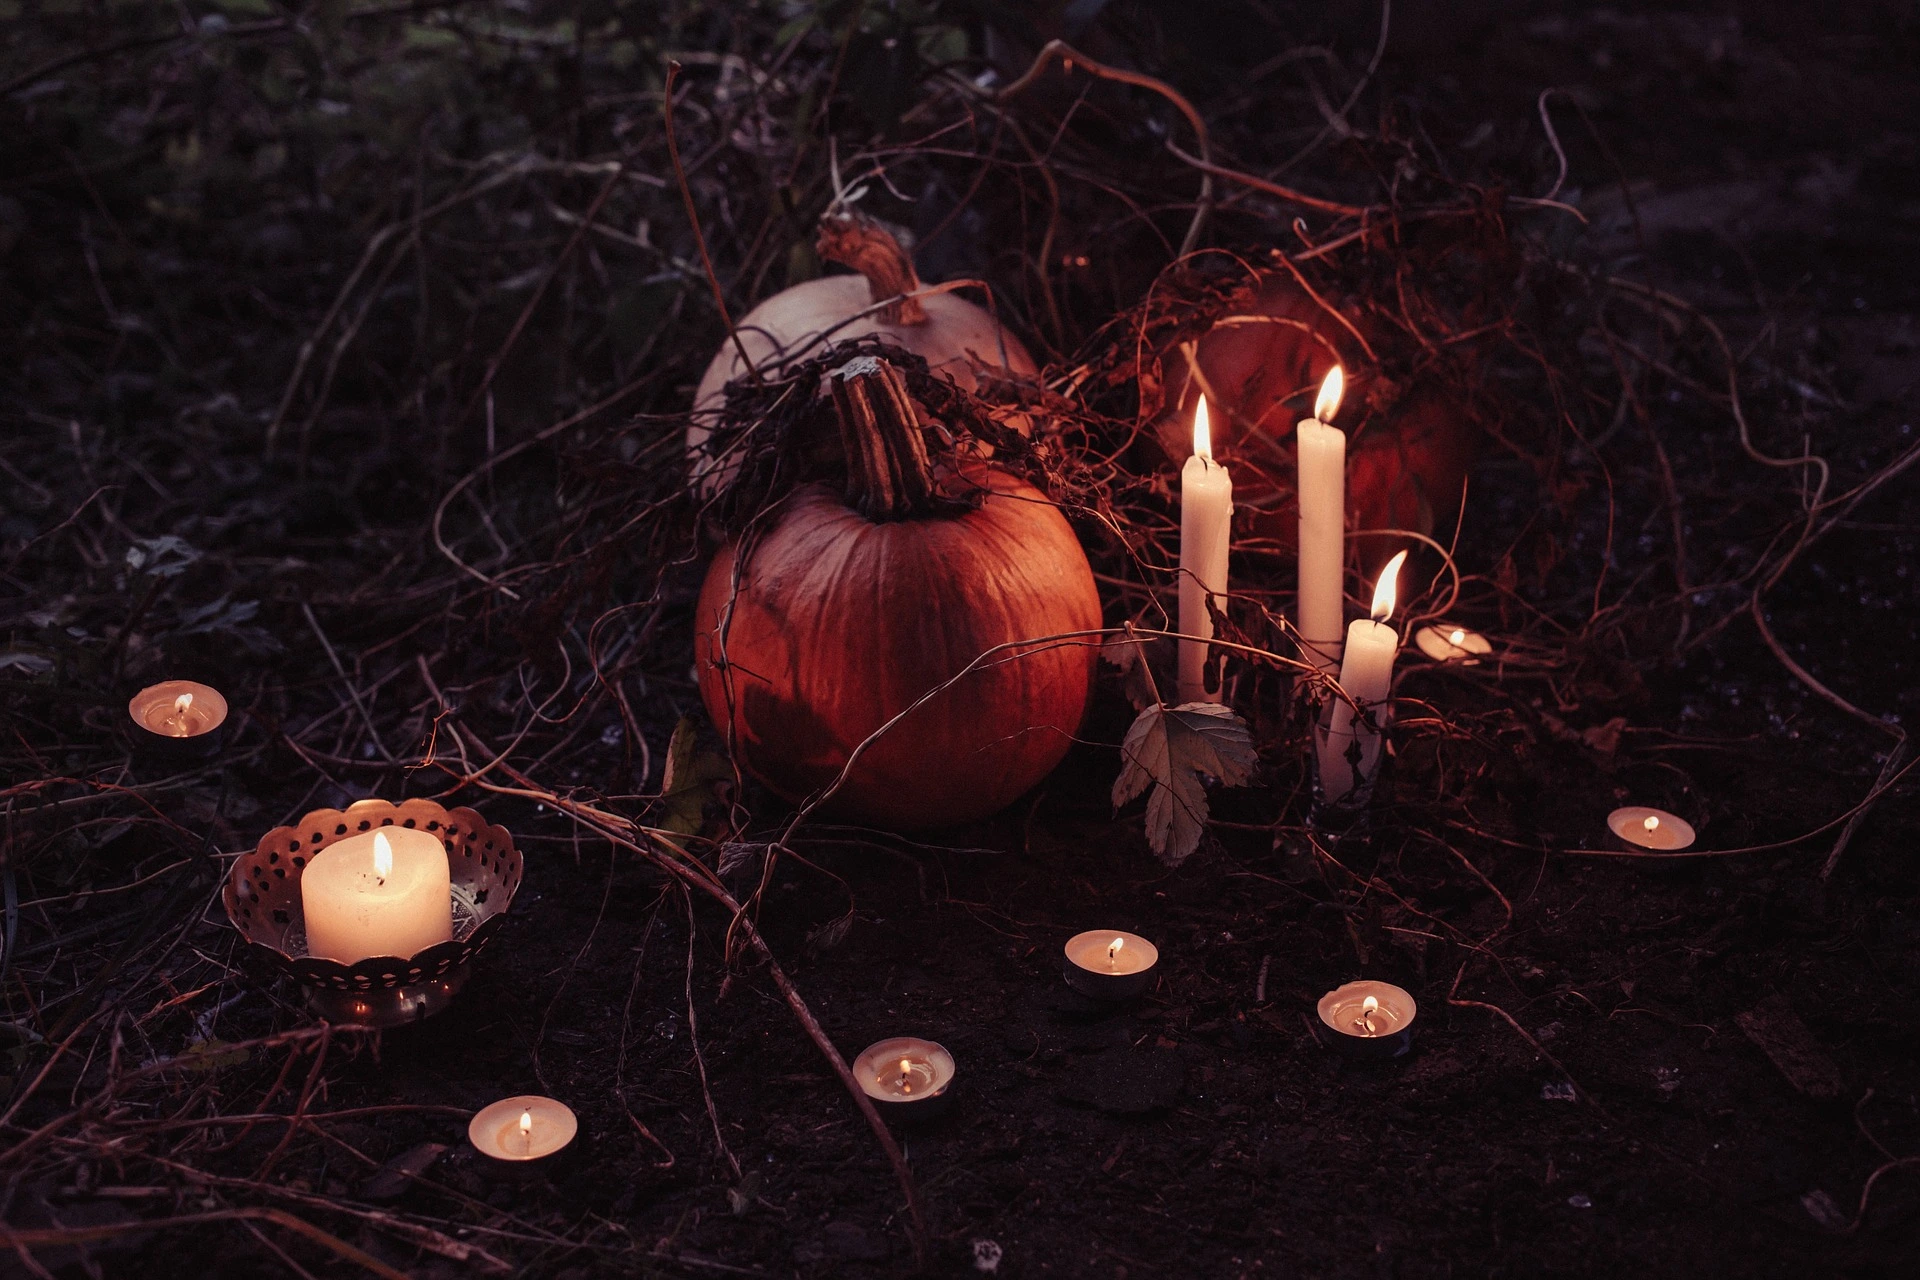
Halloween is a time for creativity and storytelling and it is a great opportunity to put aside life’s worries and engage in a little spooky silliness. Pumpkin carving takes a little time and patience however we found it surprisingly therapeutic and the finished pumpkins can be left on your doorstep for your neighbours to admire (or despise) for days.
THIS PART SHOULD NOT BE LEFT TO CHILDREN, ALWAYS CARVE RESPONSIBLY
Choosing a Halloween Pumpkin
When picking your pumpkin variety, you need to consider a few things. Are you more interested in carving out amazing tasting pumpkin flesh or carving a great design? How much space do you have to display your pumpkin and how much time do you have to carve it?
For easy to carve pumpkins that come in all sizes, go for your usual supermarket jack o’lantern pumpkin that they’ll have an abundance of at this time of year (they are also extremely cheap, ASDA currently has small children size ones for 50p). For something that looks or tastes better and will stand out in your neighbourhood, shop around for a Cinderella or several cute sugar pumpkins.
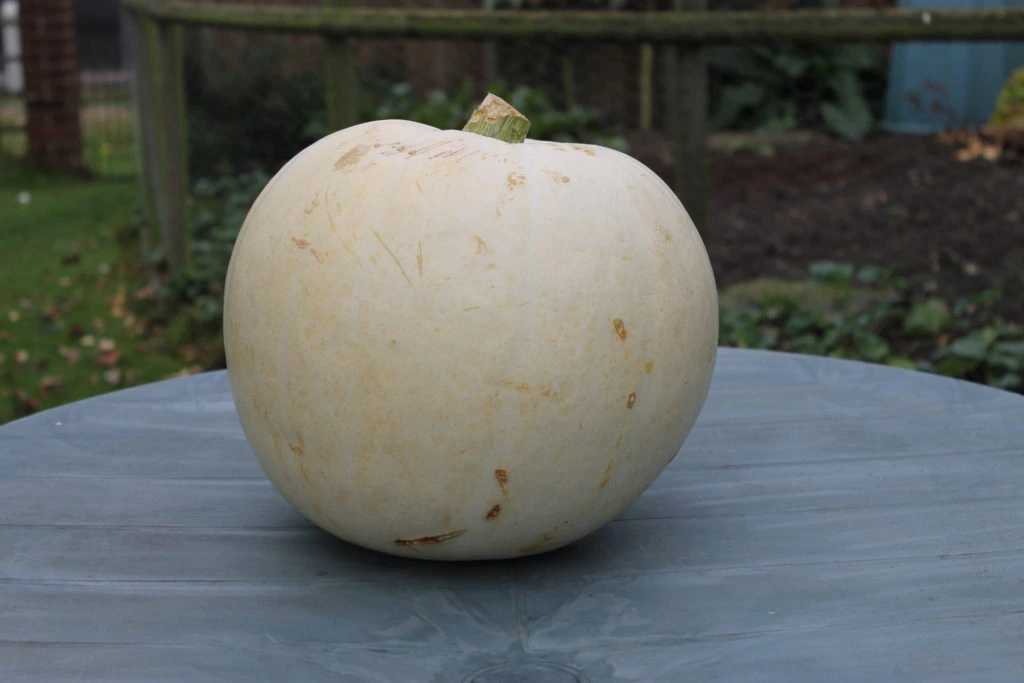
When selecting your pumpkin, look for a smooth surface on one side at least for carving. You also need to ensure that it stands flat by itself and doesn’t roll about. Scarring on pumpkins is quite common and you will be hard pressed to find a pristine pumpkin, but when the lights are out and it is lit by candles no one will notice any cosmetic damage.
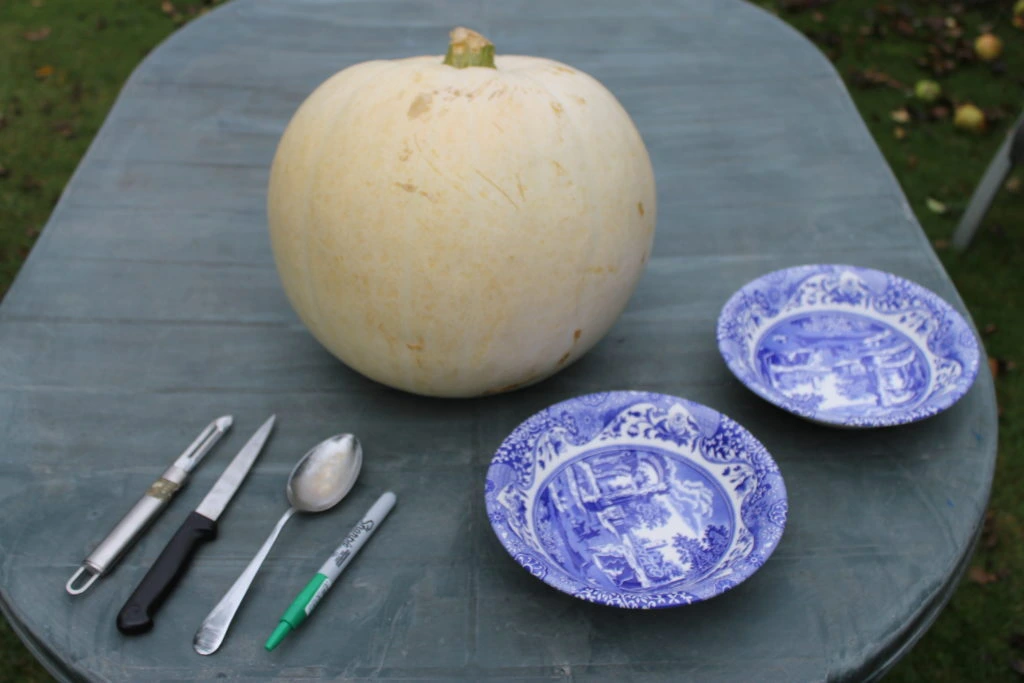
Next you need to set up your work station. If you don’t have a vinyl mat for your table indoors, do this outside as pumpkin carving can get quite messy. You will need:
- Pumpkin(s)
- Tea lights
- Tin foil
- Marker pen
- Metal spoon
- 2 bowls for collecting guts and flesh
- Large carving knife
- Small, thin, sharp knife
- Vegetable peeler
- Scalpel (optional)
Gutting The Pumpkin
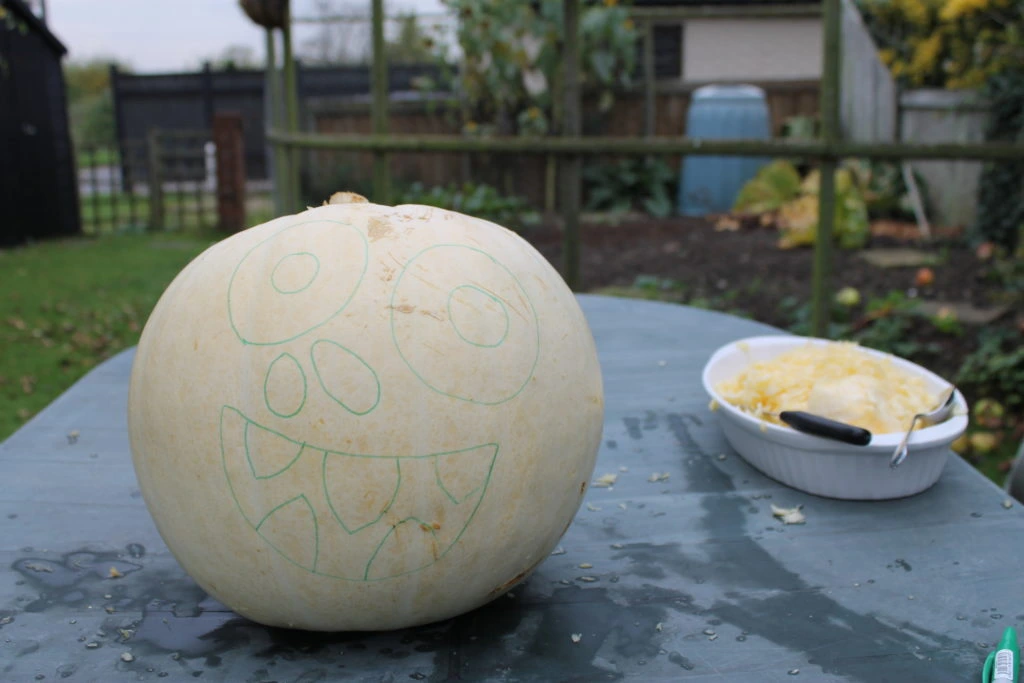
To start, sit down your pumpkin flat on the table. With your marker pen draw a circle around the stem at the top. This will be the hole you’re carving into and placing candles, so make sure it’s big enough for you to get your arm in and reach your hand in.
Using your carving knife, go in at a slight angle with the tip of the knife slanting towards the stem of the carving pumpkin. This means that once you’ve carved the pumpkin inners out, the lid won’t just fall through to the bottom.
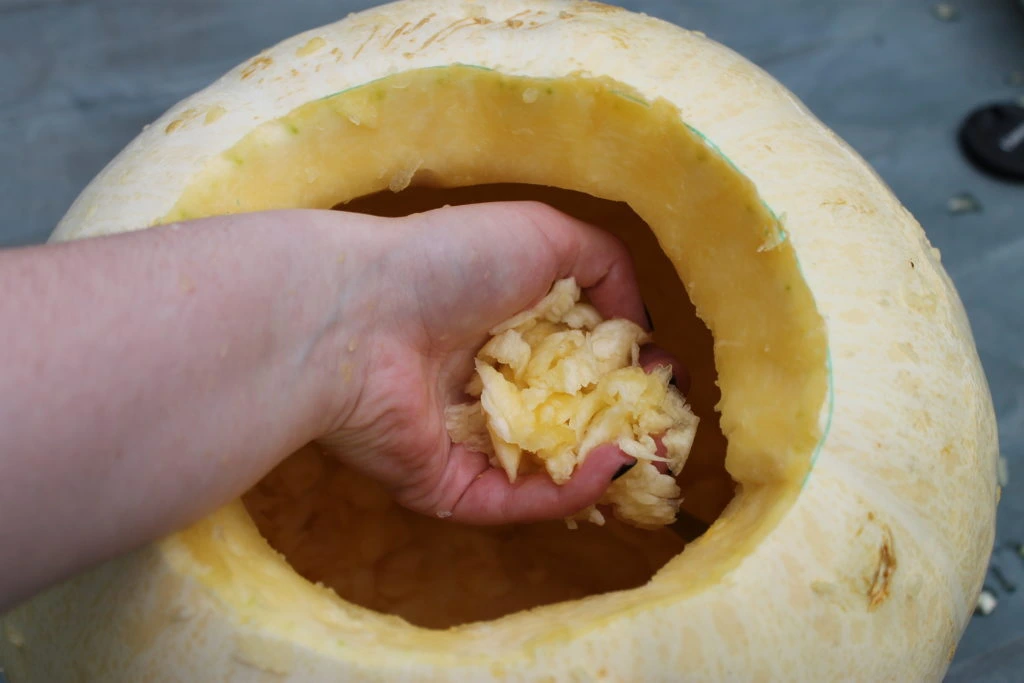
The lid might be attached by stringy guts so pull it out of the carving pumpkin and start by cleaning it up. Pull off the guts using your hands (much easier than using a spoon) and place any seeds in your seed collecting bowl.
Next, reach into your carving pumpkin and grab hold of the seeds and stringy pumpkin guts. Pull these out and put in your seed bowl for cleaning later and turning into our scrummy cookies.
Remove all the guts you can with your hand, occasionally getting in there with the spoon to loosen them from the pumpkin walls.
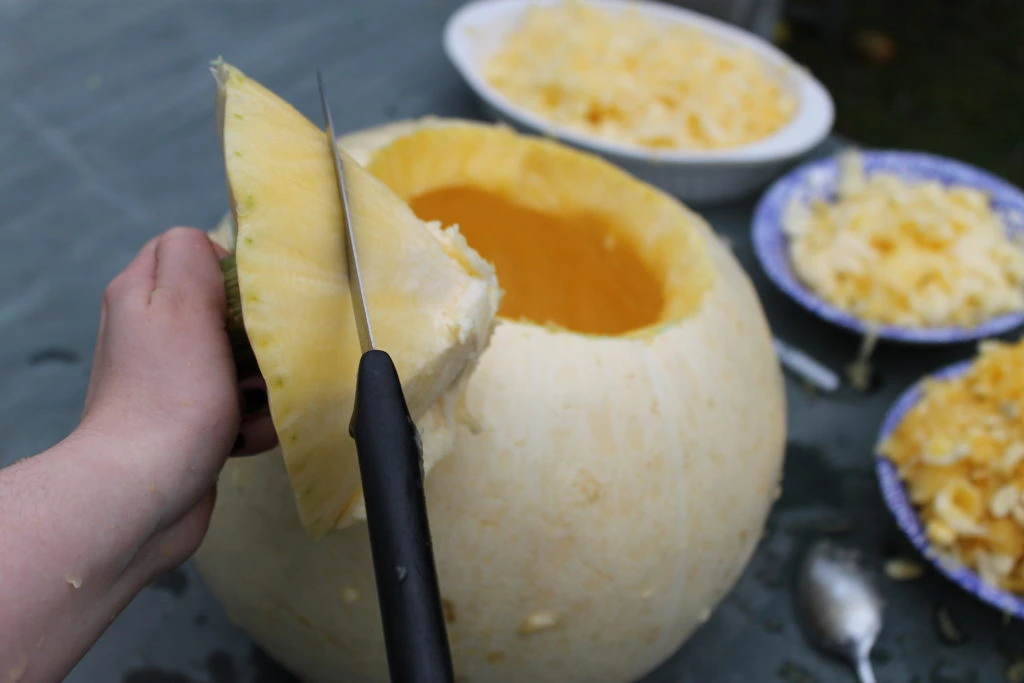
Next you need to start removing the flesh. Begin with the lid, using your sharp knife to cut off the inner flesh at the bottom in chunks. Leave enough so that the lid is still firm and holds its shape well.
Then carve out some of the flesh inside the pumpkin. Using your metal spoon, scrap the side going from the base right to the top. Turn your pumpkin a degree, then scrape again. Keep going round your pumpkin to evenly scrape out pumpkin flesh.
To start with the pumpkin may come out as little flecks but as you get going you’ll find that it comes out in strips instead. Save all of this in your bowl earmarked for collecting pumpkin flesh. The thinner you carve the insides, the easier it will be to carve out the face and get a great glow from the candle.
Keep carving until you have enough pumpkin flesh for your recipes or your pumpkin has thinner walls. We recommend trying to get as close to an inch in thickness as possible.
Lastly, carve inside the pumpkin at the very base to make sure it is flat: if it’s bumpy your candle won’t sit properly or will fall over. If you’re using plug in fairy lights (a safer but less traditional method) you can skip this bit.
If you’re using your pumpkin flesh for our cupcake recipe, cover this bowl in clingfilm. Also, store in the fridge if you’re going to make them tomorrow rather than later today. The seeds will need to be toasted anyway so they’re fine to leave out in the open to dry although covering them with a piece of kitchen towel is probably best for hygiene reasons.
Carving the Pumpkin
Wipe down the outsides of your pumpkin as it’s probably covered in a little pumpkin goo from carving the insides.
Next the exciting bit: picking a design to carve. First, look at your pumpkin and decide where the design is going. A smooth side is best, but if you’re pumpkin is scarred and gnarly all around then you can play to this. Use the scars to draw a warped face onto the pumpkin and be creative!
The best designs don’t have large gaps or chunks removed. If you have a wide gaping mouth, the candle will be very visible and the naked flame will be the brightest point. If you have small gaps and hollowed out parts, the candle light will glow against them, giving an overall brighter appearance.
You can easily draw on your design with a marker pen. A little water on kitchen roll rubs off the marker (even sharpie) if you make a mistake.
Carving – begin with your long sharp knife. Make precise cuts with straight lines. Don’t drag the knife, simply push it through then pull out and stab again a little further along. If you have curved lines, cut using the same method but a little within the lines – you will carve the curved line once the large chunk is out. It is important that the knife you have selected is robust enough to cope with this, brittle or poorly made knives could snap, break or cause injury.
To remove the chunks once you’ve cut all around them, push them into the pumpkin or carefully skewer them with a fork and pull towards you. Place these in your bowl of pumpkin flesh. When it comes to using the flesh in a recipe, you’ll want to pick out the nicest pieces so save them all.
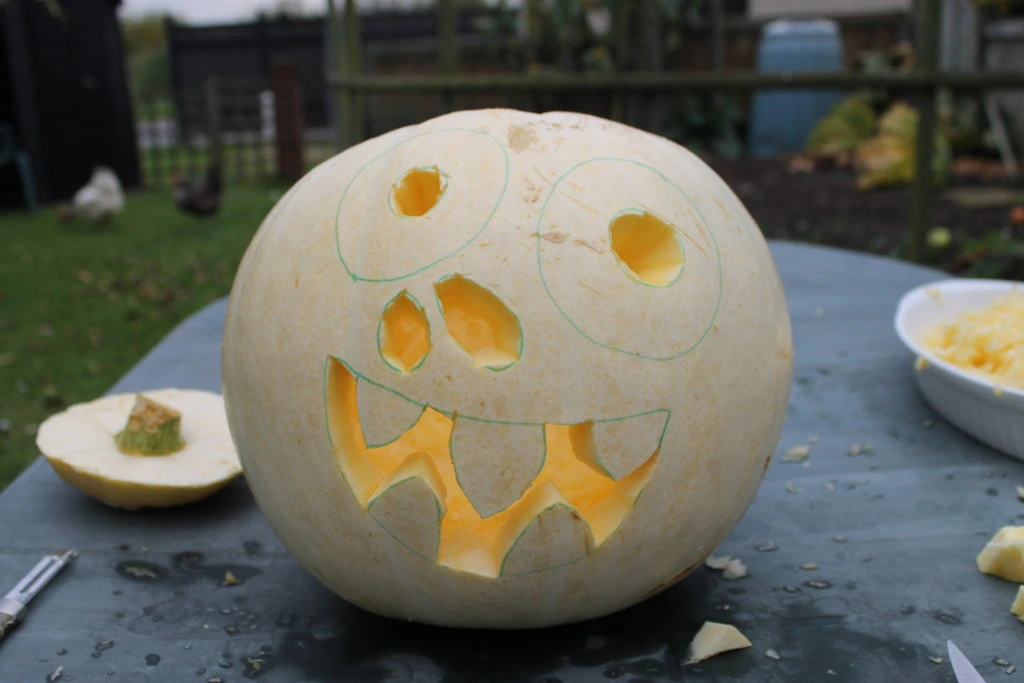
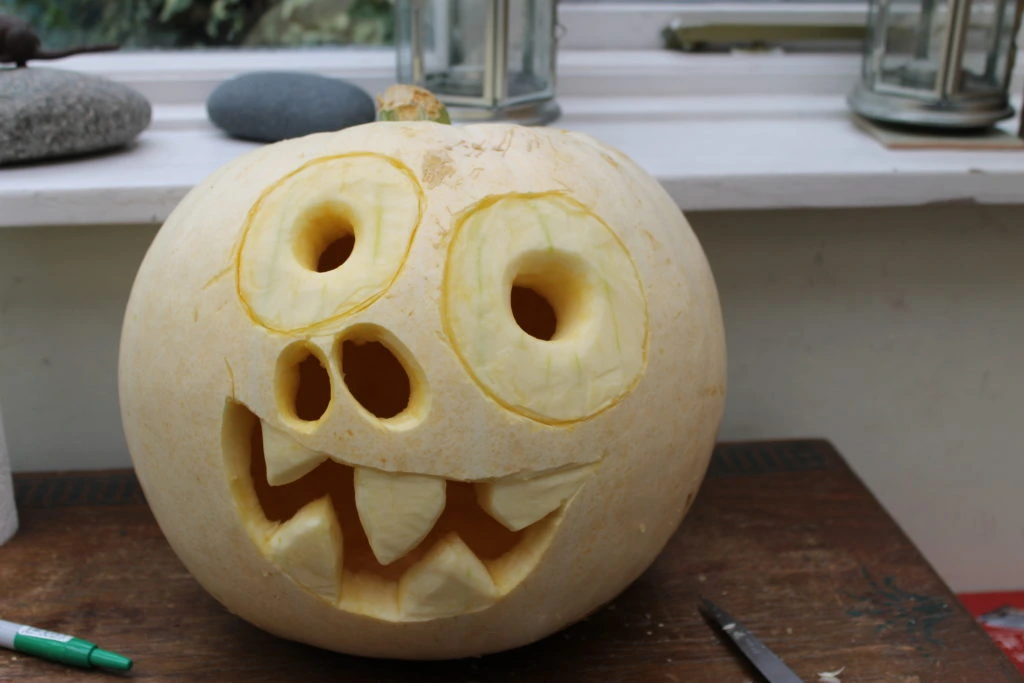
Detailing – using your knife and peeler, start to carve away at the holes, rounding the edges if need be, making sure that everything is smooth. Carving pumpkin holes that narrow as they get deeper makes for nice glowing shapes that the light travels down and bounces off. Once you’ve finished doing this, your pumpkin will look almost finished.
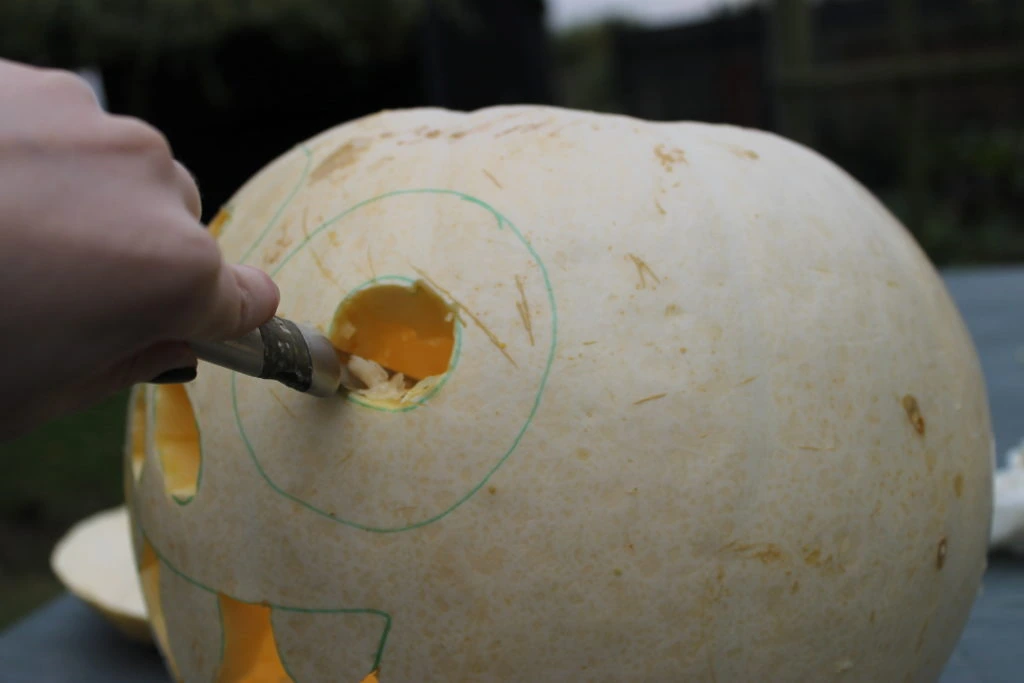
Skinning – to make opaque shapes and shadows, carve off just the outer skin. For the teeth on my ghost pumpkin I am using the knife and peeler to remove the white skin on the outside, then shaping the flesh. This part requires some finesse and patience, especially if you’re shaping thin bits of pumpkin flesh that can easily break. Keep going until your pumpkin is fully carved and shaped into a spooky face!
Setting up Your Pumpkin
Once your pumpkin is carved into your finished masterpiece, you’ll want to fix up the lid nicely. To do this, place the pumpkin lid onto a sheet of aluminium kitchen foil and wrap it up the sides, moulding it to the pumpkin with your hands.
Pop the lid onto the pumpkin and cut off any excess aluminium poking out of the sides. Using the stalk as a handle, the lid should easily lift free with aluminium still attached so you can place a few candles inside.
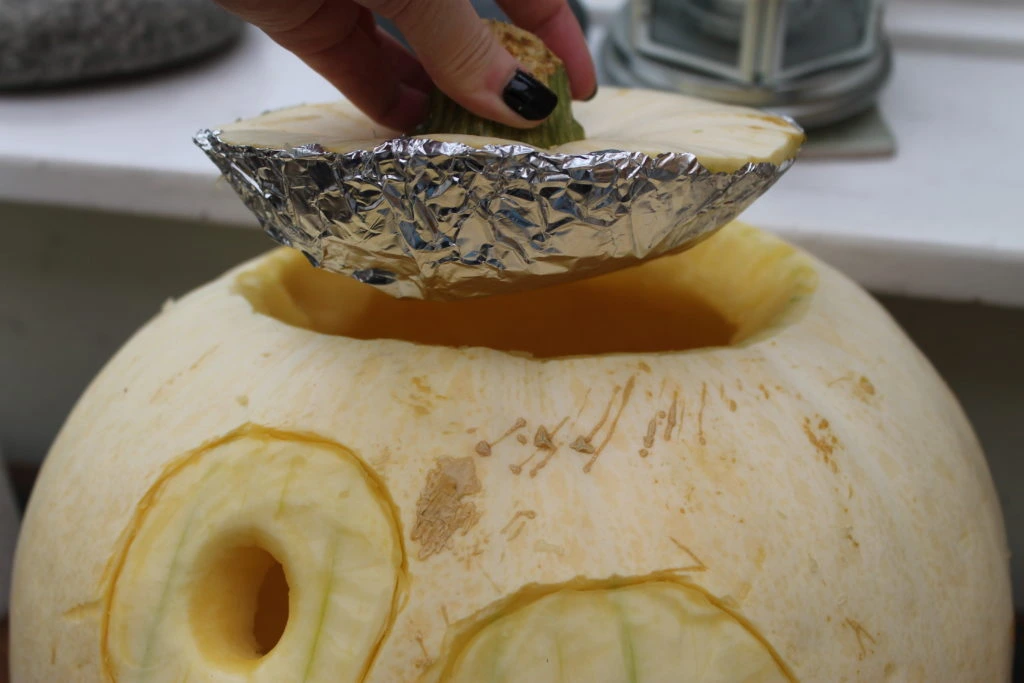
With the shiny reflective aluminium foil in the lid, your candles in the pumpkin will really glow!
Place one (or multiple if your carving pumpkin is very large) tea lights in the base of your pumpkin, using a long match or stick to light them through the gaps in your carving. If this isn’t possible you’ll have to carefully light the candles through the lid.
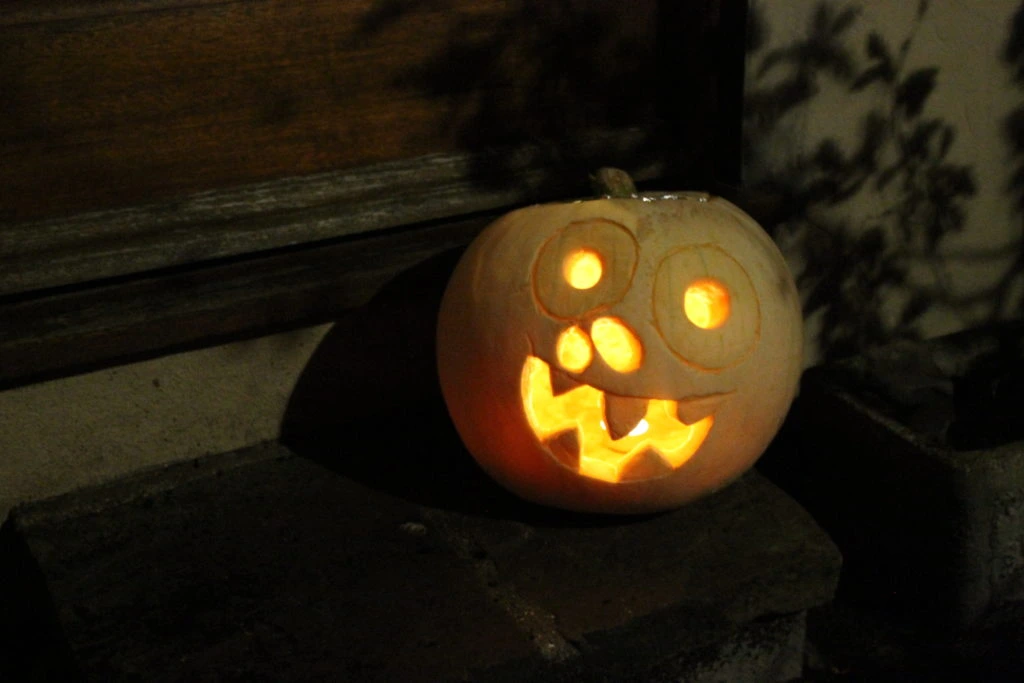
That’s the pumpkin carved and ready to greet the trick or treaters, next you need to make some yummy snacks with your pumpkin leftovers! We hope you enjoyed our first Halloween blog, we have two more coming so check back for a couple more of our spooky delights over the next week.