Learning how to make a beaded bracelet is easier than you think. This DIY beaded bracelet tutorial will teach you how to create a simple yet elegant bracelet using seed beads in just 20 minutes – perfect for beginners.
I’ve been making beaded jewellery for years, and this is the method I always come back to. It’s therapeutic, straightforward, and produces beautiful results. Whether you’re new to beading for beginners or want to learn a reliable technique, this seed bead bracelet tutorial will give you a solid foundation.
You don’t need expensive materials or complex patterns. With basic supplies like seed beads (size 9/0 or 8/0), jewellery thread, a clasp, and a beading needle, you can create a dainty, elegant bracelet that’s perfectly customised to your wrist size.
How to Make a Beaded Bracelet: Materials & Instructions
I’ll take you through how to craft your own simple bracelet step by step. First, gather your materials:
Small work surface that’s well lit – if like me, you want to be crafting while the TV is on, use a dinner tray or large, shallow container so your beads can’t roll off your lap or down the sides of the sofa.
Beads – I love using glass beads, not just for the shine but they feel cool when you put them on and tend to be more robust and higher quality than their plastic counterparts. For your first simple bracelet pick just 1 colour in 1 size. I recommend using seed beads, size 9/0 or 8/0. Any smaller and you’ll find you need to focus a lot harder, any larger and your bracelet will feel less dainty and more clunky. My preferred brand for seed beads is RedTwo on Amazon.
Clasp – I use twist clasps as they’re my favourite and don’t easily come undone once they’re on. You can use any clasp you like. For this simple tutorial, we’ll be wrapping the thread directly against the clasp but if you want to have it look a little more professional, consider using crimp beads (another blog post in the making) with wire.
Want to know how to make bracelets without clasps? If you don’t have a clasp, you’ll need to use elastic thread instead that you can simply tie in a loop and stretch over your hand. If you’re doing this, stop after Step 2, cut your bracelet thread free, tie it up, trim the ends and you’re ready to go!
Thread – I use a nylon type thread that is especially for jewellery making. It’s quite strong yet fine enough to pass through your size 9/0 beads two or three times (this is important later). You can buy the same Nymo thread that I use but Silamide is also a good option.
Beading needle – for beads as small as we’re using, you definitely need to use a needle like this one or your thread is going to fray and cause all sorts of problems. I have a little plastic tube that I keep my needles in for storage, but when working on a jewellery piece I make sure to have a magnet nearby to stick my needle to rather than putting down on the tray and losing track of it.
Scissors – find them before you start so you don’t have to stop midway.
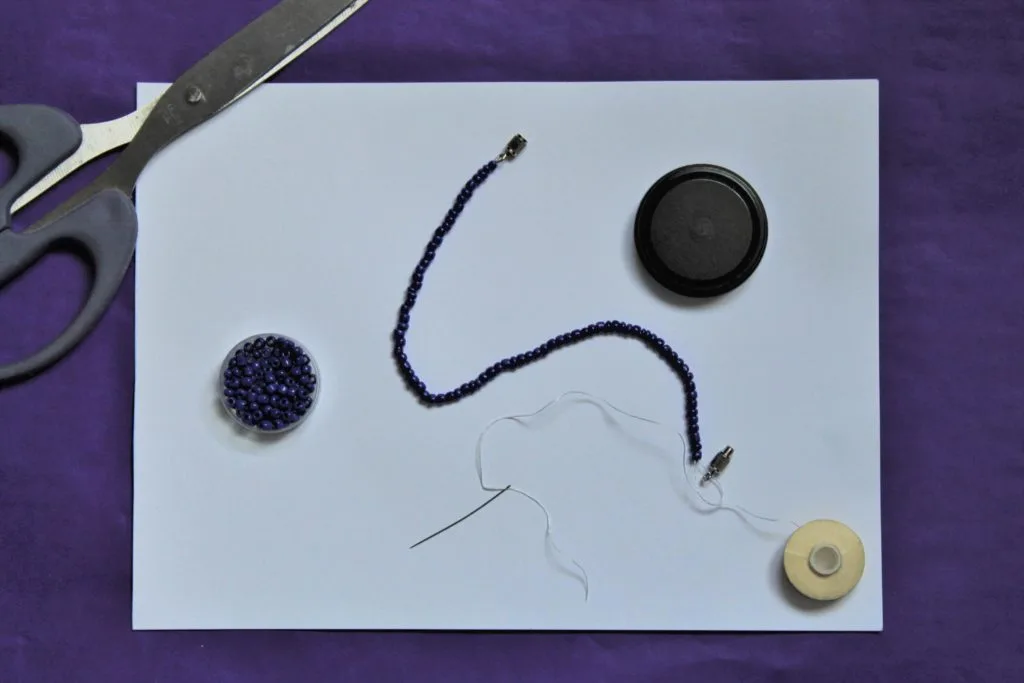
Step 1: Set Up Your Craft Place
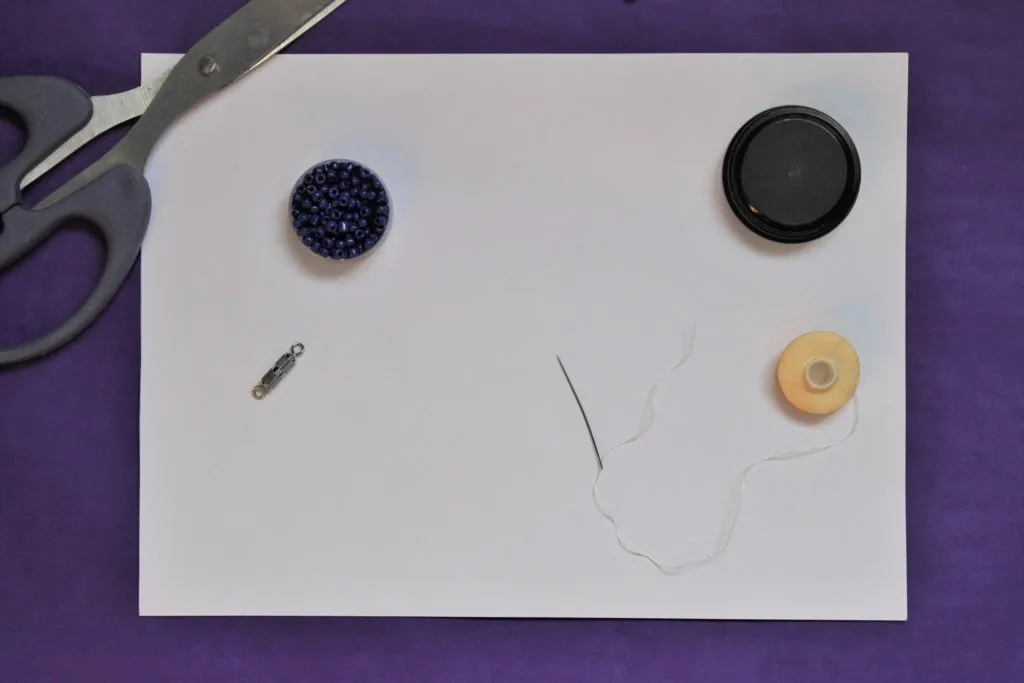
Make sure that everything you need is in reach (TV remote, glass of wine etc.) so you’re not reaching for things and knocking beads everywhere. I’ve knocked whole trays of beads on to the floor too many times to count in the past. To save you pulling out your hair with frustration you should be organised!
Then set up your craft place as shown above, threading the needle but not cutting a piece of thread off the reel.
If you’re struggling to see what you’re doing, place a sheet of paper in the bottom of your tray or in your lap if the container is transparent: if you’re using dark beads, use a white piece of paper and if using lighter beads use darker paper.
Step 2: How to Thread Seed Beads
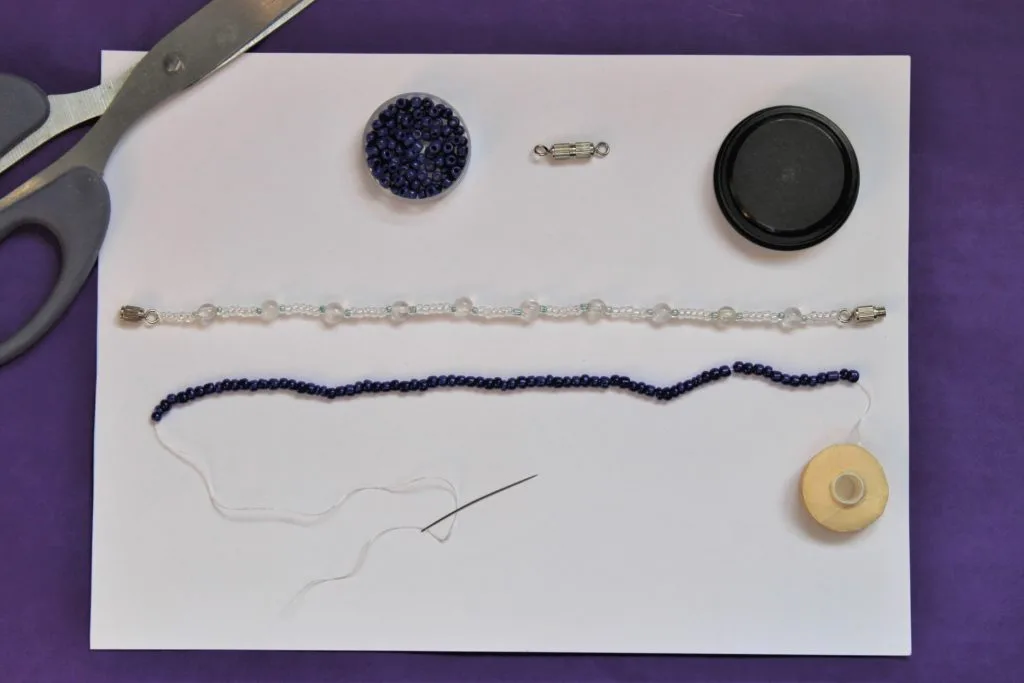
Pick up your needle and start threading on beads, one by one. Pouring out your beads into a wider container makes them easier to pick up. I tend to pinch a bunch between my fingers and then using the needle I pull them out from between my fingers – it sounds intricate and fiddly but this method of how to make bracelets actually gives you a lot of control as no beads are slipping around. You can literally feel where the needle is going against your fingertips.
I lay out a bracelet I know is the perfect length for me and lay my thread of beads next to it to compare. If your beads are smaller than your comparison bracelet, you can reduce the size of your new bracelet a little. For larger beads, make it slightly longer.
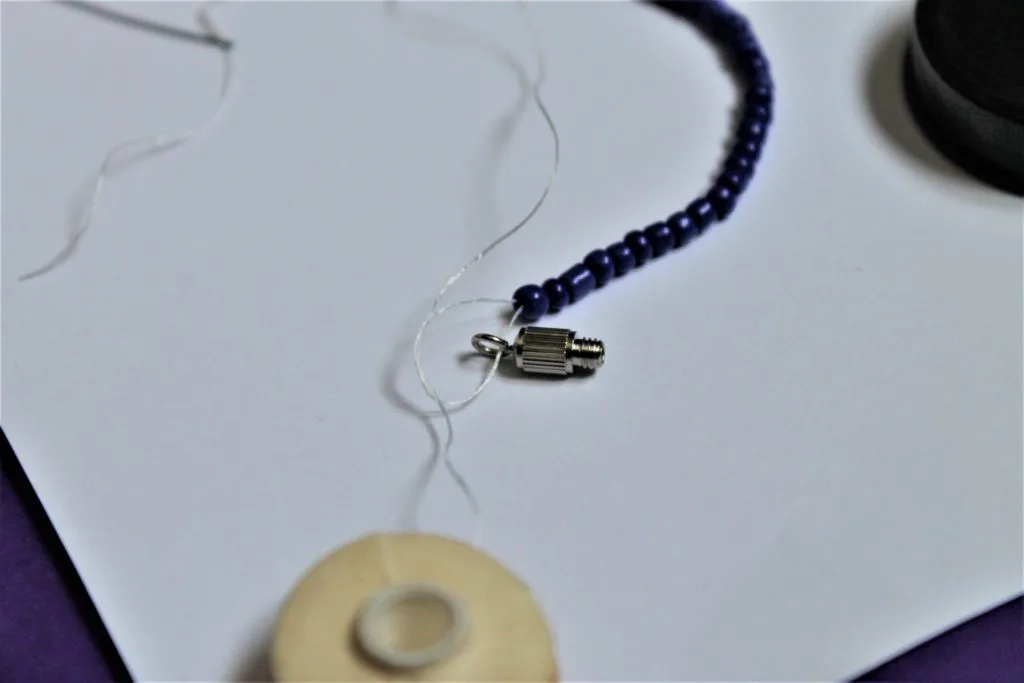
Step 3: Adding the Clasp
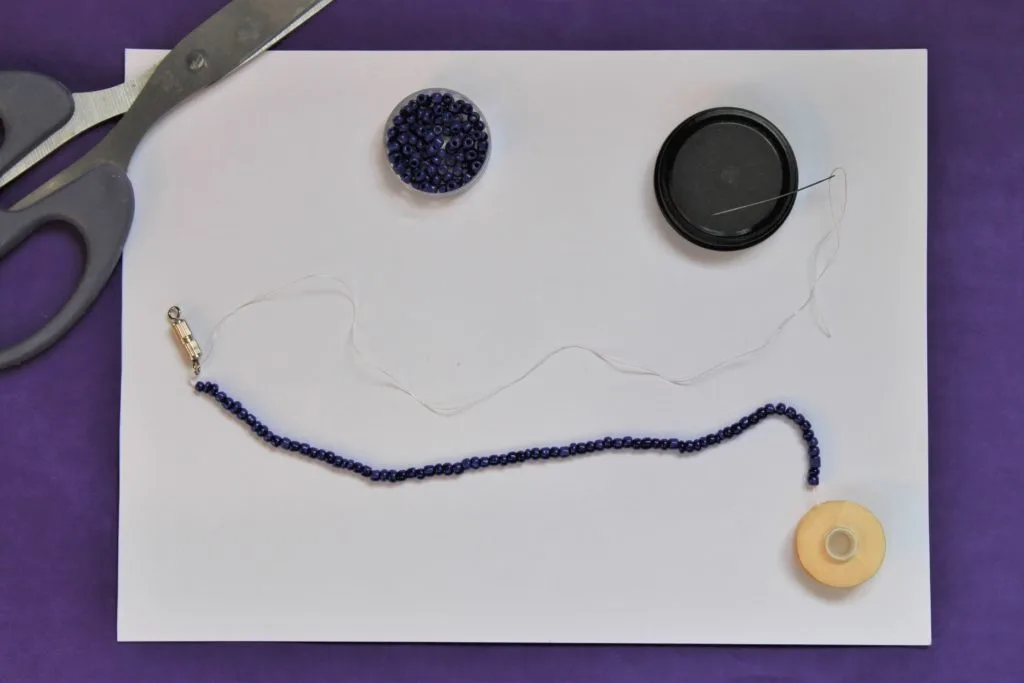
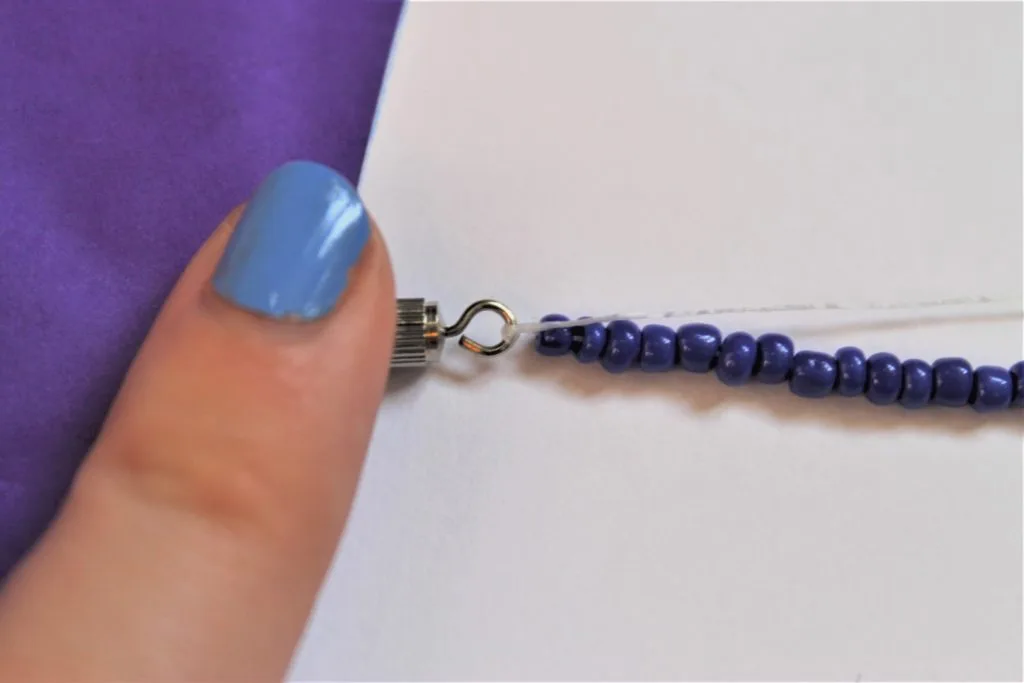
Using your needle, thread on the clasp, going through the loop a few times. Make sure you have enough thread loose between the needle and the clasp once it’s pulled through (see the picture) to be able to double back and reach the other end of your beads.
You can tie a knot here if you like, to ensure that the clasp will stay in place. Then start to double back, threading through all the beads in reverse – be very careful not to miss any or you’ll end up with a bumpy bracelet. When you reach the other end, do a check back to ensure that there are no missed beads.
When first learning how to make bracelets, use this method when it comes to the clasp because it just makes the whole process a lot more fluid, plus the end result is nicer and stronger. If you simply tied the ends of the thread to each clasp, you’re going to have a visible knot, which is fine but not as durable.
I remember one particular time when I had simply tied the end to the clasp. The bracelet just snapped at the knot and beads went everywhere across the car park I was walking through. To avoid that happening to you, make sure you follow my method instead, it is a lot stronger.
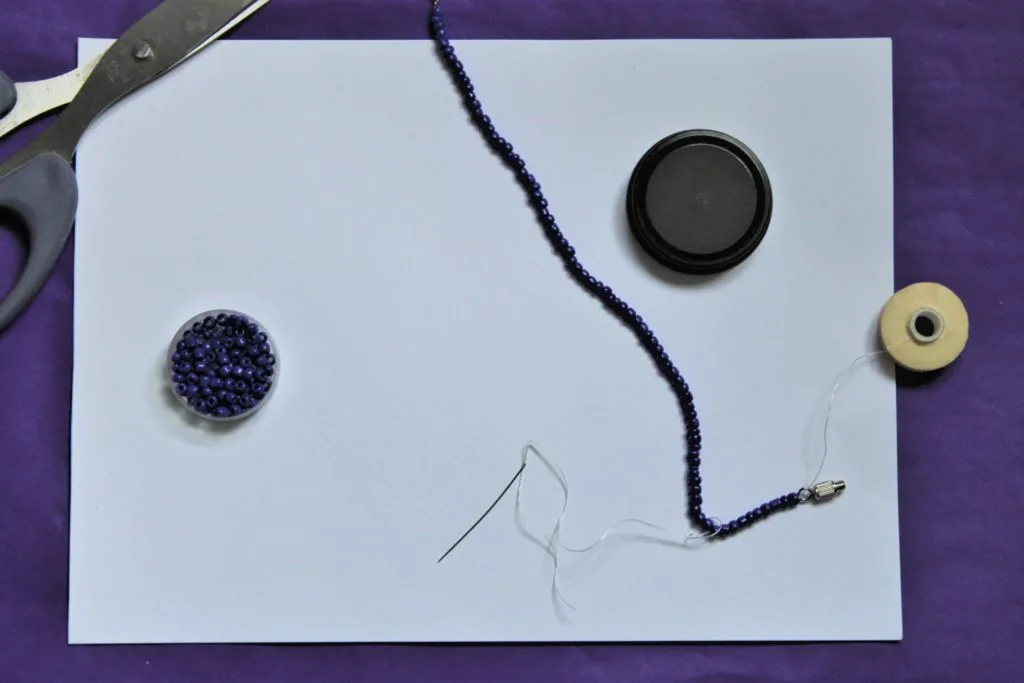
Step 4: Finishing the Clasp
Now you’ve doubled back, you should have two pieces of thread coming out of the same end of the bracelet, one attached to the reel, the other with the needle at the end.
Add the other piece of the clasp and tie as you can see in the picture. Make sure that the thread is pulled taut, so your beads aren’t sliding around showing the thread beneath… but also make sure it’s not too tight so that it’s causing tension on the thread from the beads.
You should still have some thread left on the needle, so once again, double back. Thread backwards onto, say 5 or 10 beads, then tie a double knot. It should slide right between the beads and be invisible. Then, thread another 5 or 10 beads along and tie again. Do this several times or as many times as your piece of thread allows, then you can simply cut the thread as close to the beads as possible.
Cut your bracelet free from the reel. If the thread on the needle end was quite short, cut so the reel end is longer. Thread your needle on and start to double back again, tying knots as you go but in different places to the other thread. Cut off in the same manner.
By doing this, your thread has to untie itself in several places to come undone, and the ends of your bracelet at the clasp become one continuous piece of thread without an end to fray or come loose. Don’t worry, all knots and ends are hidden.
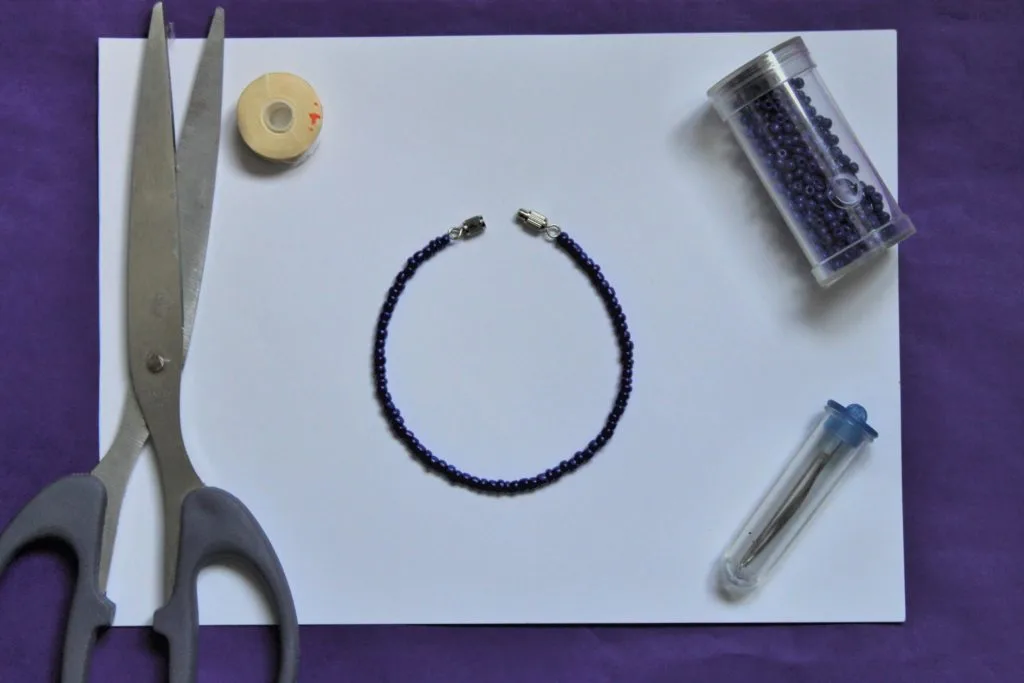
Here’s what my finished bracelet looks like:
FAQs
Start with seed beads (size 9/0), jewellery thread, a beading needle, and a clasp. Thread beads onto the string to your desired length, attach the clasp by threading through it multiple times, then double back through all beads for strength. Tie knots between beads to secure.
Seed beads in size 9/0 or 8/0 are ideal for beginners. They’re small enough to look delicate but large enough to work with easily. Glass seed beads are more durable and higher quality than plastic ones.
Use elastic jewellery cord instead of regular thread. Thread your beads, then tie the ends together in a secure knot. The elastic stretches over your hand so you don’t need a clasp.
Use nylon jewellery thread like Nymo or Silamide. These are strong, fine enough to pass through small seed beads multiple times, and won’t fray easily like regular sewing thread.
A simple seed bead bracelet takes about 20 minutes once you know the technique. Your first bracelet might take 30-40 minutes as you learn, but it gets faster with practice.
Don’t forget to leave a comment with any questions or suggestions to help others learning how to make jewellery. Follow me on Instagram @izzysden to see more beautiful handcrafted jewellery pieces.