When it comes to making homemade cards, whether it’s for Christmas, birthdays, or just random thank you notes, I have done it all. And it’s not just because I can’t get out to a place that sells cards… I could order some online, after all.
Creating your own cards shows the recipient that you spent more than 20 seconds picking out a card at the petrol station. It’s thoughtful, caring, and you might just find that the experience of making cards is lots of fun!
This simple 3-step guide shows you the best shortcut to creating your own cards for birthdays, Christmas, thank you notes, and any occasion.
Making homemade cards doesn’t need to be time-consuming or require artistic skills. By using colouring books and blank cards, you can make your own cards that look professional and personalised in just 20 minutes.
Here’s how to make cards that look beautiful every time, using just 3 easy steps.
Step 1: Choose Your Design from Colouring Books
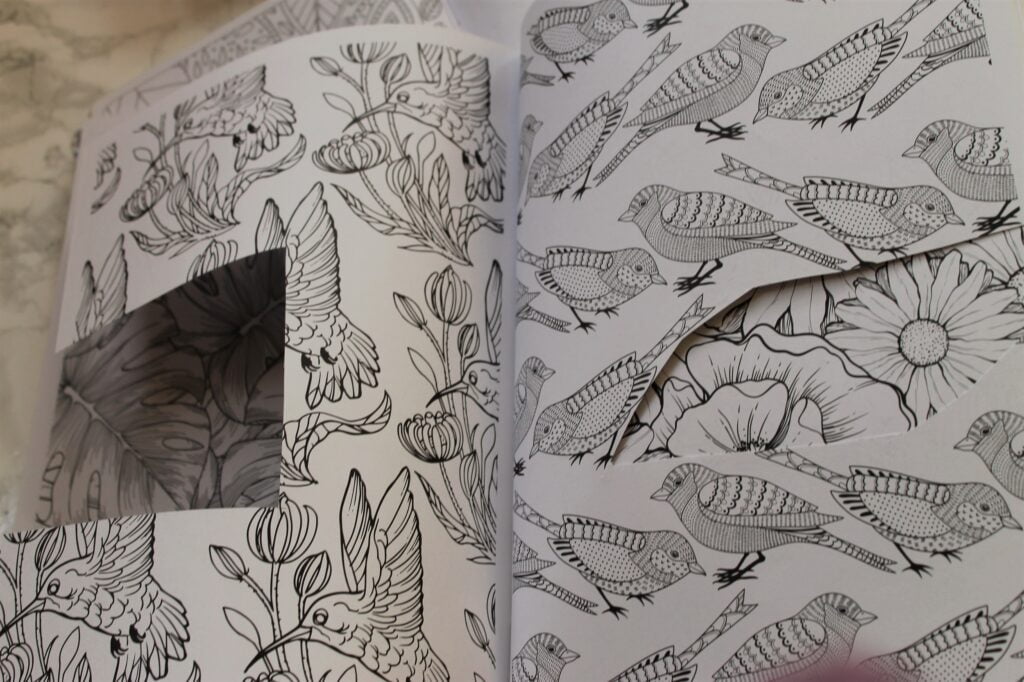
To get started making your own cards, find colouring books that have big designs isolated on a plain background. You can use colouring books for adults or children’s colouring books – the key is finding images that suit your occasion.
In the photo above, you can see where I’ve cut out birds from a colouring book as a demonstration. The great thing about this approach to homemade card making is that you don’t need to be overly imaginative – just find something that fits your occasion.
Recommended colouring books:
- Bloom Colouring Book – flowers that work for any occasion,
- Motivational Swear Words Colouring Book – comes with great phrases to colour in and cut out, like “cheer the fuck up” and “fuck I love you” that would be awesome on a card. You could also cut out individual letters to create your own phrases.
- Large Print Colours and Frames – plenty of isolated designs that are super easy to cut out and not too intricate to colour.
- Mindful Patterns – a lot of colouring books err towards feminine designs, but if you want something that will work for an recipient and any occasion, these quirky patterns are perfect.
Alternative Sources: You could even reuse tea packaging if you’re a tea-head like me. English Tea Shop usually have some interesting packaging for their tea blends that work brilliantly.
Step 2: Colour and Cut Out Your Design
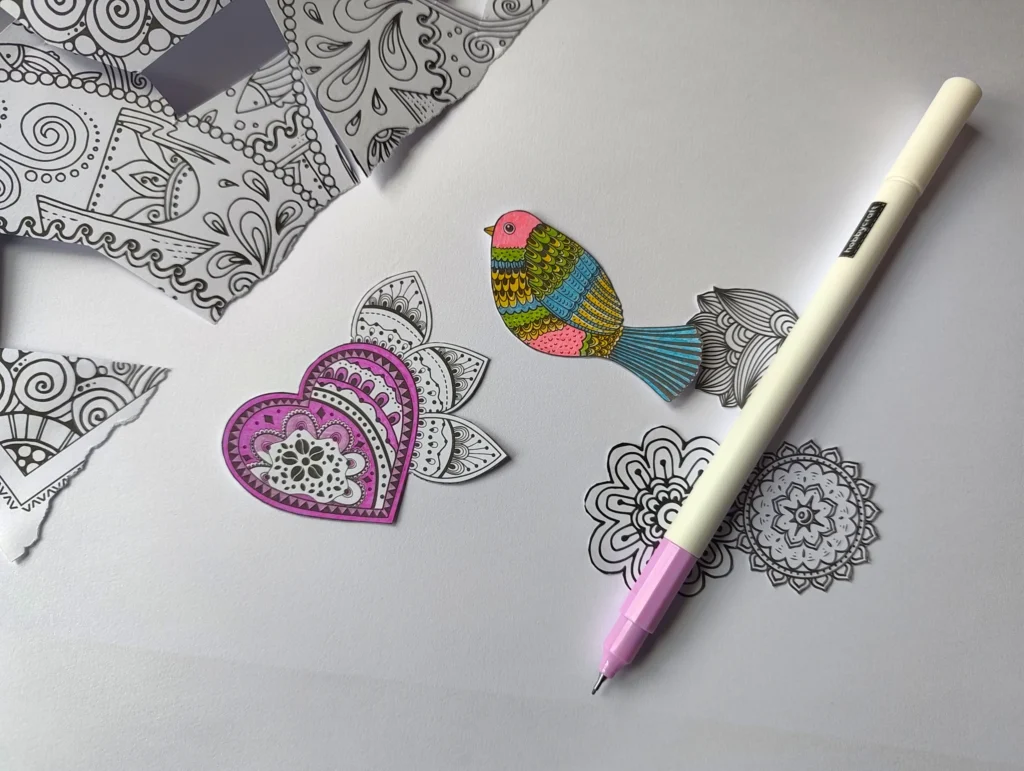
Now it’s time to add colour to your chosen design. This is where making homemade cards becomes therapeutic – perfect to do while binge-watching your latest show!
Colouring options:
- Felt tips: Clean, vibrant colours (my personal favourite)
- Watercolours: For a softer, artistic look – try splashing watercolours over the design for a modern effect
- Paint: Flick paint over it with a toothbrush for a very contemporary look
Once you’ve coloured your design, carefully cut it out. You can leave a small white border around the image or cut right to the edges – both work well for homemade cards.
Step 3: Assemble Your Homemade Card
This final step brings everything together to create your own card.
What you’ll need:
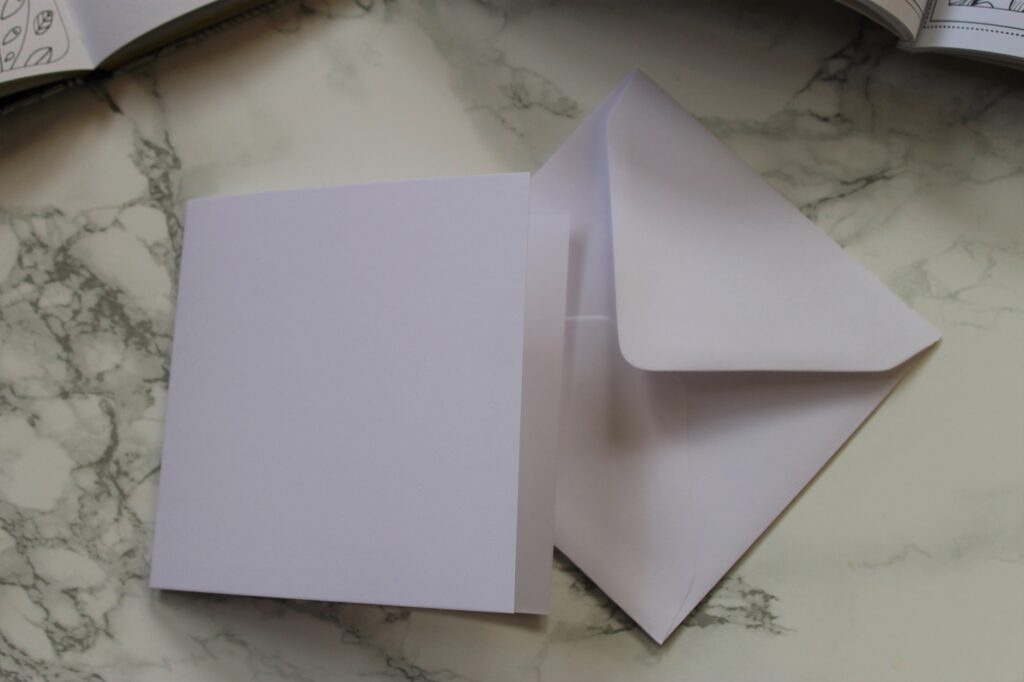
- Blank cards with envelopes – Available from Hobbycraft (UK) or Amazon. Make sure they come with matching envelopes!
- Glue or double-sided tape – Choose one that’s great for paper
How to assemble:
- Take your blank card and position your coloured design on the front
- Glue or tape it in place
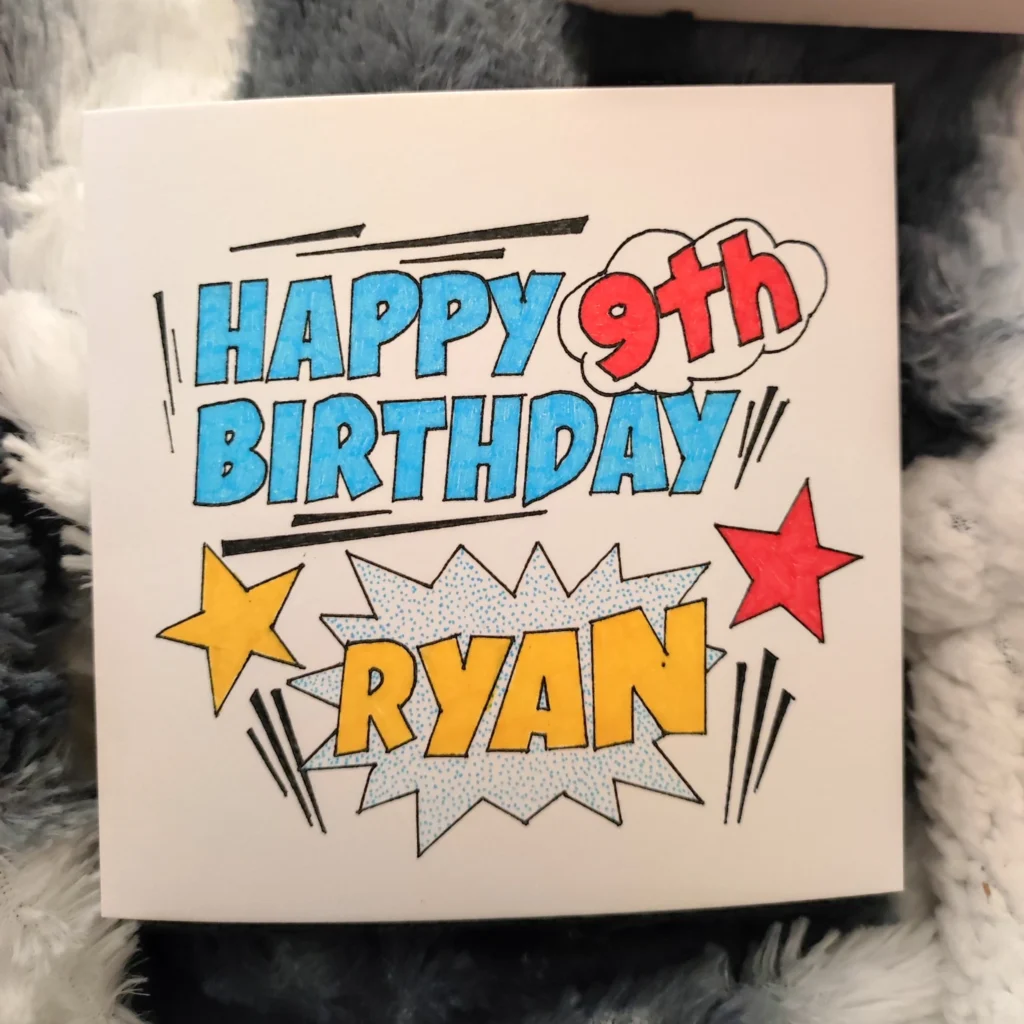
- Add your message to the front:
- Cut out letters from newspapers/magazines to spell “THANK YOU,” “HAPPY BIRTHDAY,” etc.
- Hand-write your message if you’re confident
- Font tracing trick: Visit 1001 Free Fonts, type your phrase in your favourite font, turn your screen brightness up to maximum, then trace the letters by holding your card over the screen!
- Write your personal message inside
- Done! Your homemade card is ready to send (assuming you have an up-to-date address…)
FAQs About Making Homemade Cards
The easiest way to make homemade cards is to use colouring book designs. Choose a design from a colouring book, colour it in with felt tips or watercolours, cut it out, then glue it onto a blank card. Add your message and it’s ready to send!
You need colouring books (or magazines with nice images), felt tips or watercolours, scissors, blank cards with envelopes, and glue or double-sided tape. That’s it! Total cost is around £10-15 to make multiple cards.
Using this colouring book method, you can make a homemade card in about 20 minutes. It’s perfect for when you need a card quickly but still want it to be personal and thoughtful.
Hobbycraft stocks blank cards and envelopes in various sizes. You can also find them on Amazon UK. Make sure to buy ones that come with matching envelopes to save time.
Absolutely! That’s why this colouring book method works so well. You don’t need to draw anything yourself – you’re just colouring in someone else’s design and assembling the card. Anyone can do it!
Homemade cards work for any occasion: birthdays, Christmas, thank you notes, get well soon, congratulations, or just random notes to show you care. Choose colouring book designs that match the occasion.